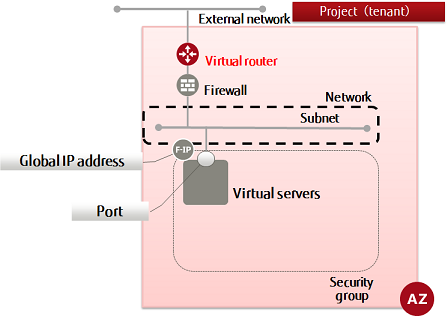
This section explains how to create a virtual router to either connect a network with an external network or to connect networks internally.
-
Set the environment variables below as follows:
$ ROUTER_NAME=<newRouterName (any)>
$ AZ=<availabilityZoneName>
-
Execute the API.
$ curl -Ss $NETWORK/v2.0/routers -X POST \
-H "X-Auth-Token: $OS_AUTH_TOKEN" -H "Content-Type: application/json" \
-d '{"router": {"name": "'$ROUTER_NAME'", "tenant_id": "'$TENANT_ID'",
"availability_zone": "'$AZ'"}}' | jq .
The following response is output:
{
  "router": {
    "status": "ACTIVE",
    "external_gateway_info": null,
    "name": "<newVirtualRouterName>",
    "admin_state_up": true,
    "tenant_id": "<projId>",
    "id": "<newVirtualRouterId>",
    "availability_zone": "<specifiedAvailabilityZone>"
  }
}
For the availability zones, AZ1 is expressed as "jp-east-1a", and AZ2 is expressed as "jp-east-1b".
-
Execute the following API to check that the virtual router was created properly:
$ curl -Ss $NETWORK/v2.0/routers -X GET \
-H "X-Auth-Token:  $OS_AUTH_TOKEN" | jq .
If a list including the virtual router name that you specified is output, as follows, that means the virtual router was created successfully.
{
  "routers": [

    ...

    {
      "status": "ACTIVE",
      "external_gateway_info": null,
      "name": "<newVirtualRouterName>",
      "admin_state_up": true,
      "tenant_id": "<projId>",
      "id": "<newVirtualRouterId>",
      "availability_zone": "<specifiedAvailabilityZone>"
    },

    ...

  ]
}
Refer to the information changes of the virtual router (attached) for information on how to add a subnet using the information change feature of the virtual router.