3.4 IaaS Management#
3.4.1 Access the IaaS Portal#
To use IaaS, access the IaaS Portal from the FJCS Portal.
Before Starting#
Log in to the FJCS Portal.
Outline#
Access the IaaS Portal by following the steps below.
Procedure#
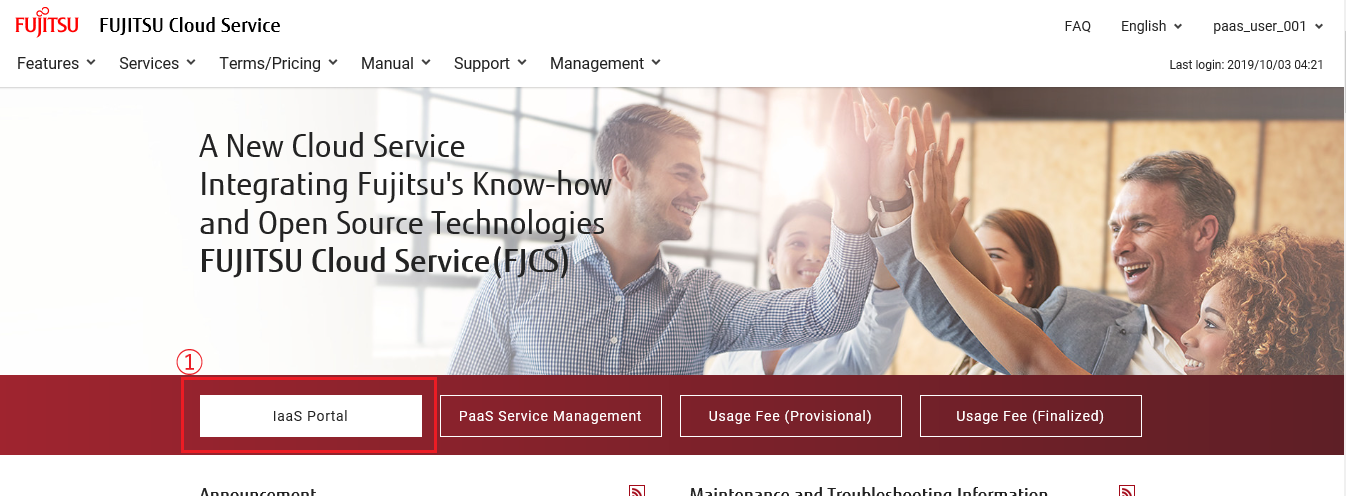
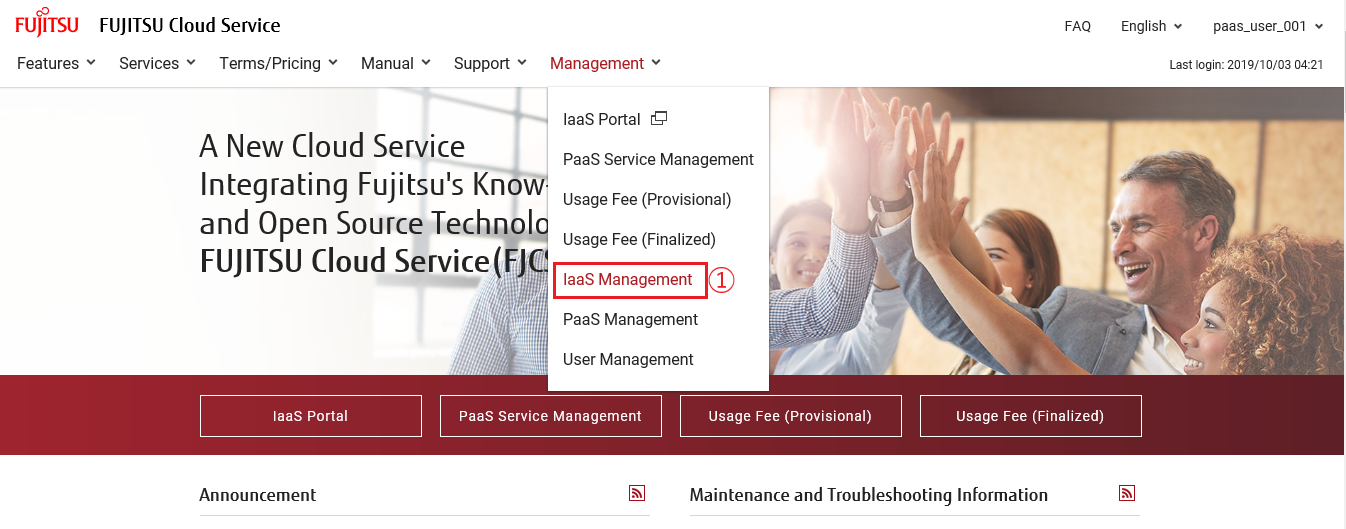
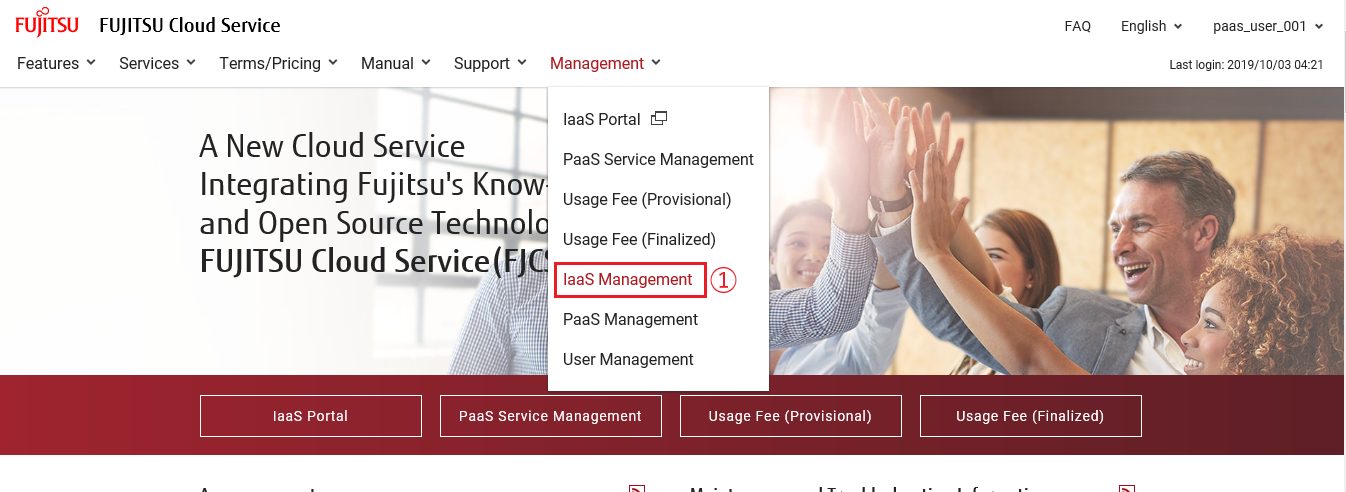
- On [FJCS Portal] screen, click [IaaS Portal] button ①.
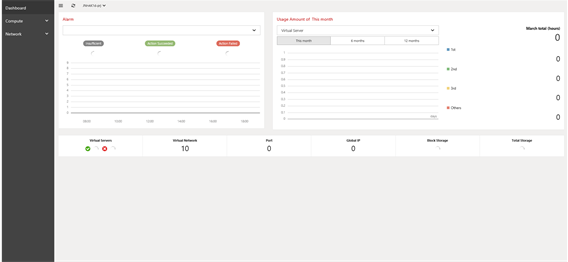
- For information on how to work with the IaaS Portal, refer to the IaaS Service Portal User Guide.
3.4.2 User Management (Project)#
3.4.2.1 Create a project#
You can create a project when, for example, you want to manage a virtual system that is used in the organizations or departments in a company, clearly separating it from others.
Before you start#
Log in to the system with the user having the role of contractor or total administrator.
Explanation#
Follow the below procedures and create the project with the log in user.
Procedures#
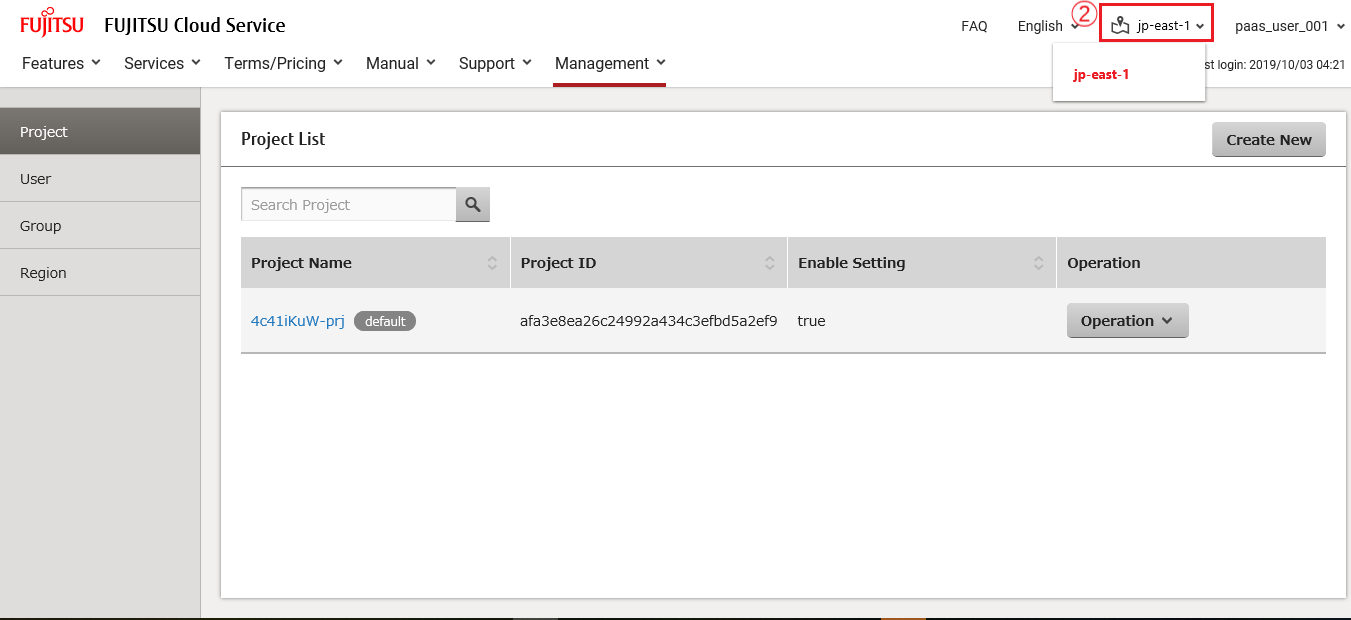
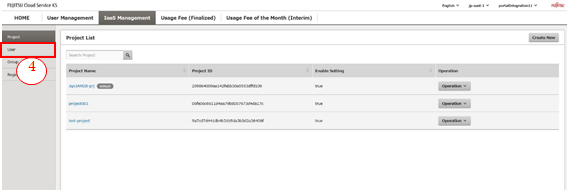
- On [FJCS portal] screen, select [IaaS Management] ① from menu tab and click it.

- Select [Region] ② from the pull-down menu on the [Project List] screen and click [Region Name] ③.

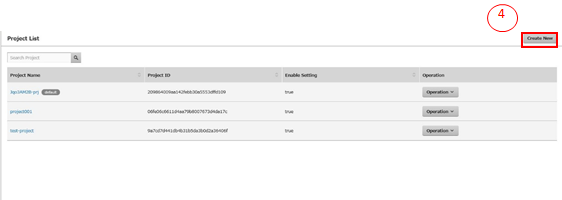
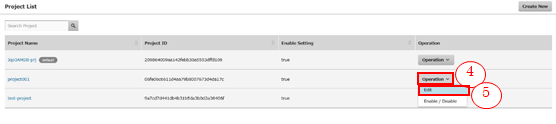
- Click [Create New] ④ on [Project List].
-
Enter project information on [Create Project (Project)] screen, and click [Next] ⑤ button. If you want to return to [Project List] screen, click [Cancel] ⑥ button.
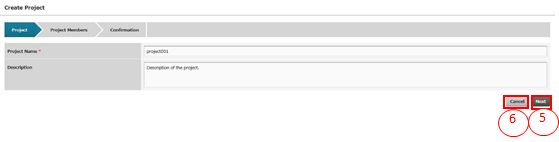
Table 14 : Entry Items for Project Information Registration
Item Name Description Project Name Following the constraint value, enter a project name.
*The project name needs to be unique in a region.Description Following the constraint value, enter the explanation of a project. -
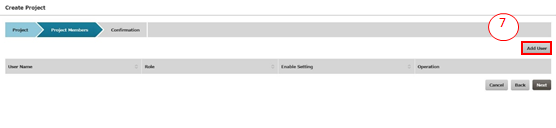
On [Create Project (Project Members)] screen, click [Add User] ⑦ button.
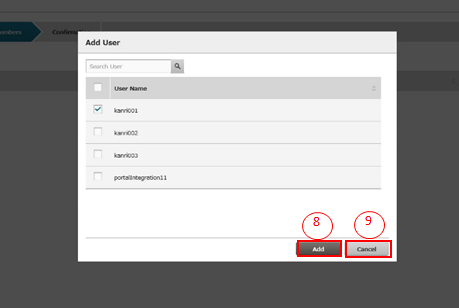
- On [Add User] screen, put a check mark in the check box on the left of a user that you want to belong to a project, and click [Add] ⑧ button. If you want to return to [Create Project (Project Members)] screen without adding any user to a project, click [Cancel] ⑨ button.
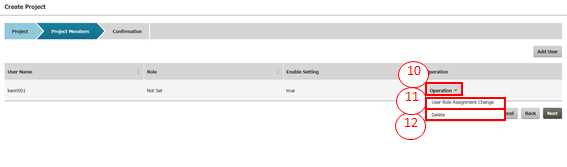
- On [Create Project (Project Members)] screen, click the pull-down menu [Operation] ⑩ for the user added on [Add User] screen and then select [User Role Assignment Change] ⑪. If you want to delete it, click [Delete] ⑫ button.
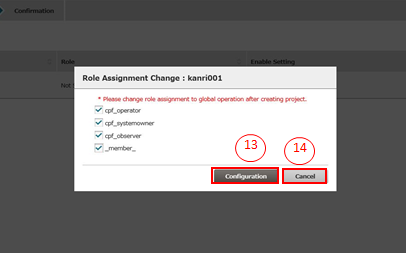
- On [Role Assignment Change] screen, select the role you want to give and click [Configuration] ⑬ button. If you want to return to [Create Project (Project Members)] screen without adding any role, click [Cancel] ⑭ button.
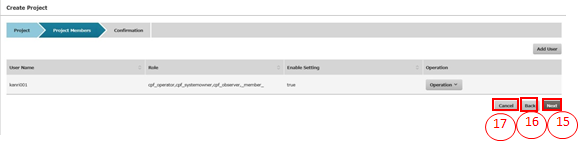
- On [Create Project (Project Members)] screen, confirm that the role selected on [Role Assignment Change] screen has been set for the user and click [Next] ⑮ button. If you want to return to [Create Project (Project Members)] screen and modify it, click [Back] ⑯ button. If you want to cancel all the contents that are being edited and return to [Project List] screen, click [Cancel] ⑰ button.
- On [Create Project (Confirmation)] screen, check the entered contents and click [Create] ⑱ button. If you want to return to [Create Project (Project Members)] screen and modify it, click [Back] ⑲ button. If you want to cancel all the contents that are being edited and return to [Project List] screen, click [Cancel] ⑳ button.

3.4.2.2 Edit a project#
Edit an existing project.
Before you start#
Log in to the system with the user having the role of contractor or total administrator.
Explanation#
Following the below procedures, edit a project as the login user.
Procedures#
- On [FJCS Portal] screen, select [IaaS Management] ① from the menu tab.
- On [Project List] screen, click the pull-down menu [Region] ② and then click [Region Name] ③.
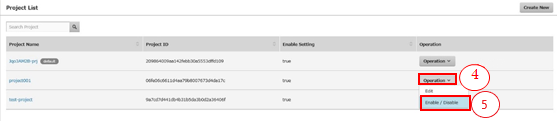
- On [Project List] screen, click the pull-down menu [Operation] ④ for the project you want to change and then click [Edit] ⑤.
-
On [Project Details] screen, enter the details of the item to be changed and click [Update] ⑥ button. If you want to return to [Project List] screen, click [Cancel] ⑦ button.
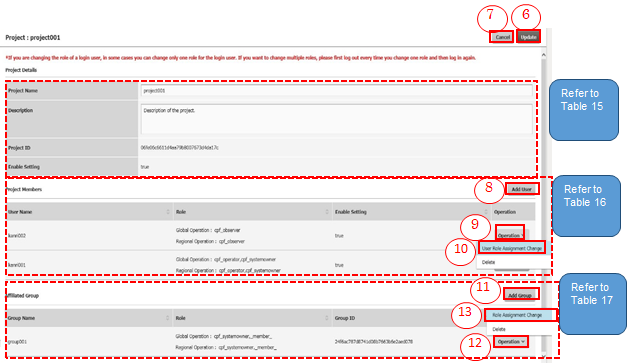
Table 15 : Entry Items for Project Details
Item Name Description Project Name Following the constraint value, enter a project name.
*A project name needs to be unique in a region.Description Following the constraint value, enter the description of a project. Table 16 : Entry Items for Project Members
Item Name Description User Name When you want to add a user to a project, click [Add User] ⑧ button. Role For the user associated with a target project, click the pull-down menu [Operation] ⑨, [User Role Assignment Change] ⑩ button, and then change the role of global operation and the role of regional operation. Table 17 : Entry Items for Affiliated Group
Item Name Description Role Change the role of global operation and the role of regional operation for the group associated with the target project. When you associate a target project, click [Add Group] ⑪ button, select a group, and then give the role of global operation and the role of regional operation. When you change a role, click the pull-down menu [Operation] ⑫, click [Role Assignment Change] ⑬ button, and change the role of global operation and the role of regional operation.
3.4.2.3 Change the Enable/Disable Setting of Project#
Change the Enable/Disable Setting of an existing project.
Before you start#
Log in to the system with the user having the role of contractor or total administrator.
Explanation#
Following the below procedure, change the enable/disable setting of a project with the login user.
Procedures#
- Click [FJCS Portal] screen and select [IaaS Management] ① from the menu tab.
- On [Project List] screen, click the pull-down menu [Region] ② and [Region Name] ③.

- On [Project List] screen, click the pull-down menu [Operation] ④ and [Enable/Disable] ⑤ for the project of which Enable/Disable setting you want to change.
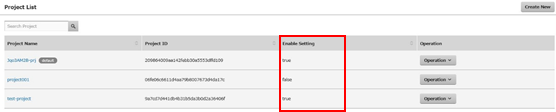
- If you click [Enable/Disable] button for the Enable (true) project, the project becomes Disable (false). If you click [Enable/Disable] button for the Disable (false) project, the project becomes Enable (true).
3.4.3 User Management (User)#
3.4.3.1 Change the role allocation associated with the user#
Change the role allocation associated with the user
Before you start#
Log in to the system with the user having the role of contractor or total administrator.
Explanation#
Following the procedures, edit users as the login user.
Procedures#
- On [FJCS Portal] screen, select [IaaS Management] ① from the menu tab.
- On [Project List] screen, click the pull-down menu [Region] ② and then [Region Name] ③.
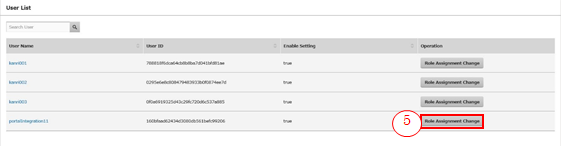
- On [Project List] screen, click [User] ④ button.
- On [User List] screen, click [Role Assignment Change] ⑤ button for the user you want to make a modification for.
-
On [User Details] screen, change the details and click [Update] ⑥ button. When you go back to [User List] screen, click [Cancel] ⑦ button.
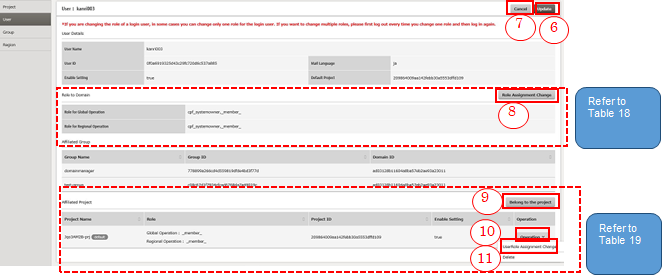
Table 18 : Entry Items for the Roles for Domains
Item Name Description Role for Global Operation Click [Role Assignment Change] ⑧ button and change the role for global operation. Role for Regional Operation Click [Role Assignment Change] ⑧ button and change the role for regional operation. Table 19 : Entry Items for Affiliated Project
Item Name Description Role For the project associated with the target user, change the role for global operation and the role for regional operation. When you associate a new project, click [Belong to the project] ⑨ button, select a project, and give the role for global operation and the role for regional operation. When you change a role, click the pull-down menu [Operation] ⑩, click [Role Assignment Change] ⑪button, and change the role for global operation and the role for regional operation.
3.4.4 User Management (Group)#
3.4.4.1 Create a group#
Create a group in a domain.
Before you start#
Log in to the system with the user having the role of contractor or total administrator.
Explanation#
Following the procedures, edit users as the login user.
Procedures#
- On [FJCS Portal] screen, select [IaaS Management] ① from the menu tab.
- On [Project List] screen, click the pull-down menu [Region] ② and then [Region Name] ③.
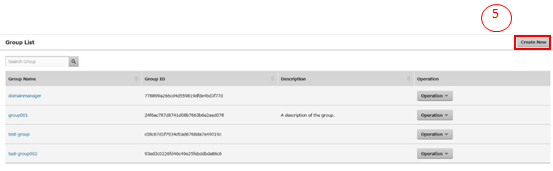
- On [Project List] screen, click [Group] ④ button.

- On [Group List] screen, click [Create New] ⑤.
-
On [Create Group (Group)] screen, enter group information and click [Next] ⑥ button. If you want to go back to [Group List] screen, click [Cancel] ⑦ button.
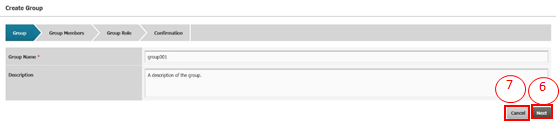
Table 20 : Entry Items for Group Information Registration
Item Name Description Group Name Following the constraint value, enter a group name. A group name needs to be unique in a domain. Description Following the constraint value, enter the description of a project. -
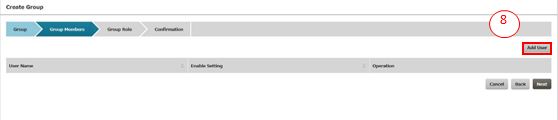
On [Create Group (Group Members)] screen, click [Add User] ⑧ button.
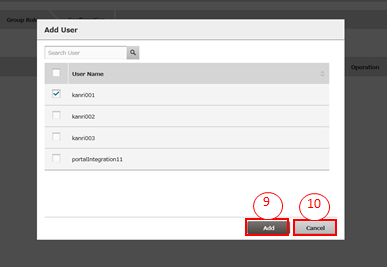
- On [Add User] screen, put a checkmark on a checkbox of the user you want to add to a group and click [Add] ⑨ button. If you want to go back to [Create Group (Group Members)] without adding any user, click [Cancel] ⑩ button.
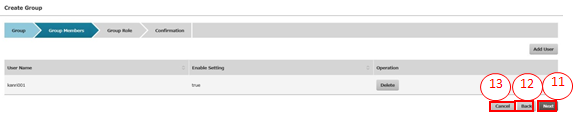
- On [Create Group (Group Members)] screen, confirm that the user selected on [Add User] screen has been set in the list and click [Next] ⑪ button. If you want to go back to the [Create Group (Group)] screen and modify it, click [Back] ⑫ button. If you want to edit all the details and go back to the [Group List] screen, click [Cancel] ⑬ button.
-
On [Create Group (Group Role)] screen, enter the information of the items to be added and click [Next] ⑭ button. If you want to go back to [Create Group (Group Members)] screen and modify it, click [Back] ⑮ button. If you want to cancel all the edited contents and go back to [Group List] screen, click [Cancel] ⑯ button.
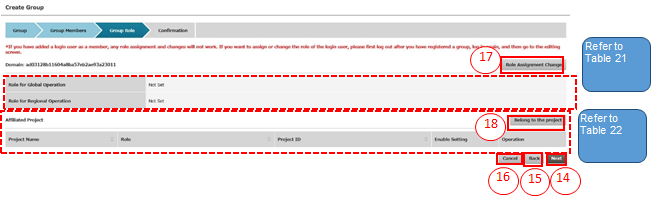
Table 21 : Entry Items for the role for domain
Item Name Description Role for Global Operation Click [Role Assignment Change] ⑰ button and change the role for global operation. Role for Regional Operation Click [Role Assignment Change] ⑰ button, and change the role for regional operation. Table 22 : Entry Items for Affiliated Project
Item Name Description Role Click [Belong to the project] ⑱ button, select a project, and then give the role for global operation and the role for regional operation. -
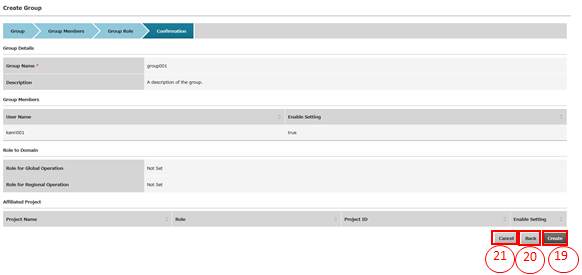
On [Create Group (Confirmation)] screen, confirm the entered contents and click [Create] ⑲ button. If you go back to [Create Group (Group Role)] screen and modify it, click [Back] ⑳ button. If you want to cancel all the edited contents and go back to [Group List] screen, click [Cancel] ㉑ button.
3.4.4.2 Edit a group#
Edit an existing group.
Before you start#
Log in to the system with the user having the role of contractor or total administrator.
Explanation#
Following the procedures, edit users as the login user.
Procedures#
- On [FJCS Portal] screen, select [IaaS Management] ① from the menu tab.
- On [Project List] screen, click the pull-down menu [Region] ② and then [Region Name] ③.
- On [Project List] screen, click [Group] ④ button.
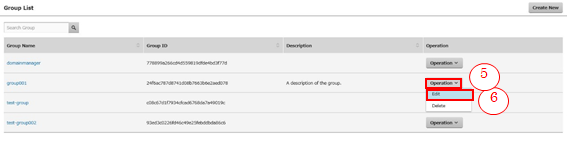
- On [Group List] screen, click the pull-down menu [Operation] ⑤ for the group you want to make a modification for and click [Edit] ⑥.
-
On [Group Details] screen, enter the information of the items to be changed and click [Update] ⑦ button. If you want to [Group List] screen, click [Cancel] ⑧ button.
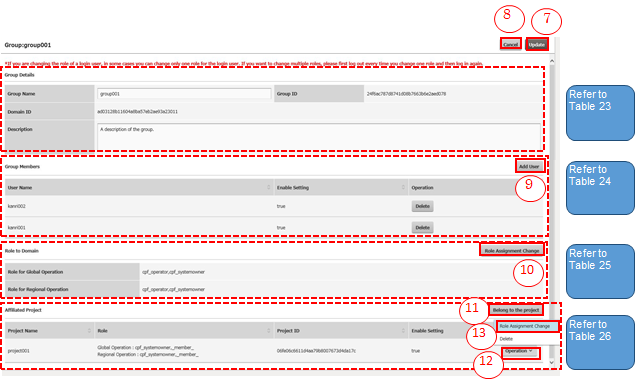
Table 23 : Entry Items for Group Details
Item Name Description Group Name Following the constraint value, enter the group name.
* Group Name needs to be unique in a domain.Description Following the constraint value, enter the description of a project. Table 24 : Entry Items for Group Members
Item Name Description User When you want to add a user to a target group, click [Add User] ⑨ button and add a user when needed. Table 25 : Entry Items for the role for the domain
Item Name Description Role for Global Operation Click [Role Assignment Change] ⑩ button and change the role for global operation. Role for Regional Operation Click [Role Assignment Change] ⑩ button and change the role for regional operation. Table 26 : Entry Items for Affiliated Project
Item Name Description Role For the project associated with the target user, change the role for global operation and the role for regional operation.
When you associate a new project, click [Belong to the project] ⑪ button, select a project, and give the role for global operation and the role for regional operation. When you change a role, click the pull-down menu [Operation] ⑫, click [Role Assignment Change] ⑬ button, and change the role for global operation and the role for regional operation.
3.4.4.3 Delete a group#
Delete an existing group.
Before you start#
Log in to the system with the user having the role of contractor or total administrator.
Explanation#
Following the procedures, delete users as the login user.
Procedures#
- On [FJCS Portal] screen, select [IaaS Management] ① from the menu tab.
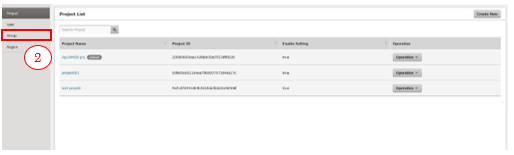
- On [Project List] screen, click [Group] ② button.

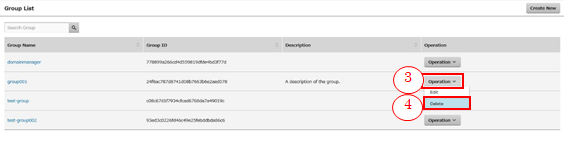
- On [Group List] screen, click the pull-down menu [Operation] ③ for the group you want to delete, and click [Delete] ④ button.
3.4.5 Use Region Management#
3.4.5.1 Start using a region#
To use the region different from the region that are being used currently, start to follow the required steps for starting to use the region.
Before you start#
・Log in to the system with the user having the role of contractor.
・The situation is that there are multiple regions and some of them are not used by any users.
Explanation#
Following the procedures, explain the procedures for starting to use a region.
Procedures#
- On [FJCS Portal] screen, select [IaaS Management] ① from the menu tab and click it.
- On [Project List] screen, click [Region] ② button.
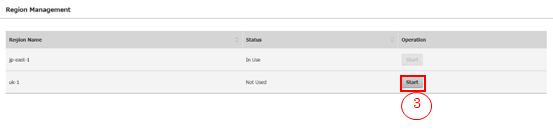
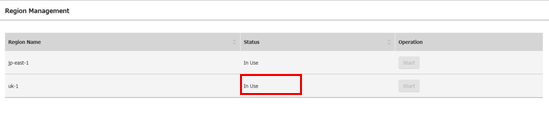
- On [Region Management] screen, click [Start] ③ button.
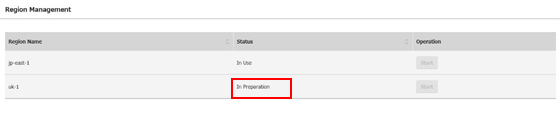
- Go to [Region Management] screen and confirm that the status is “In Preparation”.
- Update the screen after a while and confirm that the status of the region that you started to use is “In Use”. To use the region that you have started to use, log in to FJCS Portal again.
3.4.5.2 Connect to the region you started to use#
If the user with the role of contractor starts to use a region, all the other users in the same domain as the user can use the region that has been started to use.
Before you start#
・Prepare the user that belongs to the same domain as the user with the role of contractor, just as seen in 3.4.5.1 Start using a region, and proceed to operation with the user.
・After starting to use a region, log in to the system again and start operation.
Explanation#
Following the procedures, we will explain the procedures for starting to use a region.
Procedures#
- On [FJCS Portal] screen, select [IaaS Management] ① from the menu tab and click it.
- Click [Region Name] ② button at the header part on the Region Management screen and confirm that the region that has been started to use in 3.4.5.1 Start using a region is included in the pull-down menu.